Replacing damaged or faded bodywork on a 600cc sportbike usually comes down to two questions: will the paint match, and will the tabs line up? Answer both before you order and aftermarket panels bolt straight on. Get either wrong and you’re drilling, filing, and repainting a set you just bought.
The checks are straightforward once you know what to look for. Pull the bike’s paint code and compare it against a physical sample in daylight. Then measure the mounting tabs against the originals before any money changes hands. Most ordering mistakes trace back to one of those steps getting skipped.
Why 600cc Sportbike Owners Replace OEM Fairings
People don’t replace stock bodywork for no reason. The same few situations send riders to the parts counter again and again.
Crash damage is the number one cause
A low-speed slide can scuff, crack, or shatter several panels at once. On a modern 600, the bodywork interlocks with tabs and clips, so one impact often takes out three or four pieces, not just the one that hit the ground.
Crack repair costs add up fast
A repaired panel rarely matches the ones around it, and the labor to plastic-weld and repaint a single fairing can run close to the price of a whole aftermarket set. Shops see it all the time: a customer comes in for one repair and leaves with a full kit.
Riders want a different look
Sometimes nothing is broken. Riders want a custom color, a race-replica livery, or a cleaner track look. Aftermarket bodywork makes the change affordable and reversible, and the stock panels stay intact for resale.
Track use demands durability
Track and race riders go through bodywork, and they would rather not sacrifice OEM panels at the track. Fiberglass race fairings are common because they are light and repairable. Injection-molded ABS aftermarket sets are another option that absorbs impact and is cheap to replace after a low-side.
Price and availability tip the scale
| Factor | OEM fairings | Aftermarket fairings |
|---|---|---|
| Cost | High | Lower |
| Availability | Limited for older models | Broad |
| Color options | Stock only | Many |
| Track replacement | Costly | Economical |
Price matters, but it is not the whole decision. A cheap kit with thin paint or tabs that do not line up turns into an expensive return. Fitment and finish quality are what separate a good deal from a bad one, which is why the checks come before the order.
OEM Color Matching vs. Aftermarket Color Matching
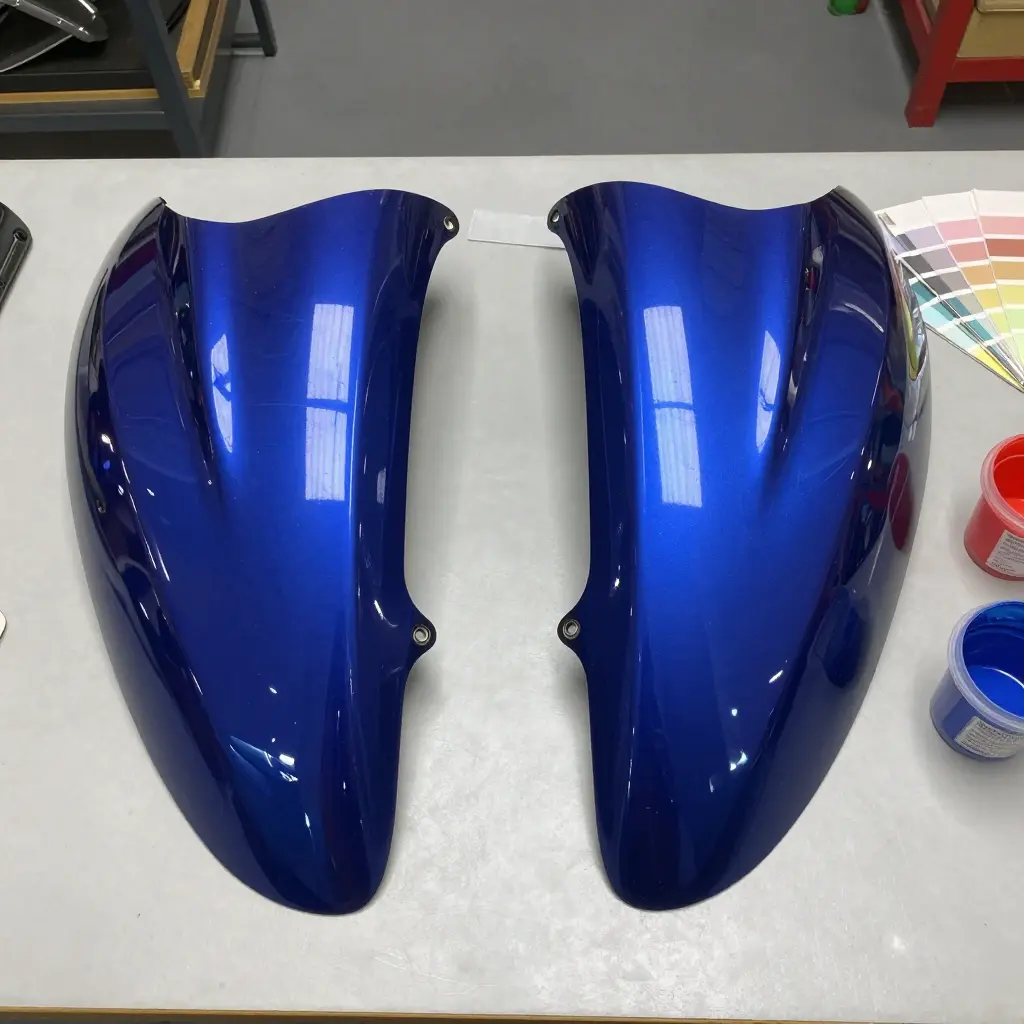
Paint does not get much thought until the new panel is bolted on and suddenly looks “off” in sunlight. Knowing why factory and aftermarket finishes differ is what makes a color match check worth doing.
Every factory finish starts with a color code, an alphanumeric ID on a sticker under the seat, inside the tail, or on the frame. That code tells a painter which pigments, toners, and effect layers went onto a specific model and production run. OEM fairings are sprayed in a climate-controlled plant to that exact formulation, so a factory replacement panel is built to match within a tight spec.
Aftermarket fairings usually take a shortcut. Many are painted to an approximation of the code rather than the factory formula, and every paint maker blends its own toners. Two suppliers can both label a panel “Yamaha Racing Blue” and still ship visibly different shades.
Factories work within a paint match tolerance too, a small but real allowance for batch-to-batch variation. Add an aftermarket painter’s own equipment, mixing ratios, and booth conditions, and the drift can run well past that allowance.
Metallic and pearl finishes make it harder. The aluminum flakes or mica in the paint reflect light at different angles, so the color changes as you move around the bike. A panel can look perfect head-on and wrong from the side.
The clear coat on top matters just as much. Factory finishes usually build depth and gloss with multiple coats that also block ultraviolet light. To hold down costs, aftermarket suppliers may spray fewer or thinner coats, which changes both how the paint looks and how long it lasts.
That thinner protection shows up as UV fade. Original panels sit in the sun for years while pigments and clear coat break down and the finish slowly shifts. A perfect match to the factory code still will not match a faded panel sitting next to it.
A screen or a photo cannot settle a color decision. Cameras auto-correct white balance, monitors render the same hue differently, compression flattens subtle metallic shifts, and every photo captures one light source at one angle. A swatch that looks identical online can be three shades off in daylight.
So check color the way it will actually be judged: against the bike, in daylight, with the paint code, the paint system, and a physical sample in hand. Confirming those details before ordering prevents the most common fairing disappointment.
Color Match and Verification Options for 600cc Sportbike Fairings
Before you click “buy,” sort out which kind of color source you are dealing with, how accurate it is, and what the seller expects you to check. The four routes below cover most replacement fairings for a 600cc sportbike. Pick the one that fits your bike, your budget, and how much time you want to spend.
| Color Source | Accuracy Level | Verification Method Before Ordering | Typical Lead Time | Best Suited Use Case |
|---|---|---|---|---|
| Factory OE paint code | Highest – exact match to original | Confirm your bike’s paint code against the VIN-decoded factory spec and the OEM fairing part number; ask the seller to state the code on the invoice | 1-3 weeks (OEM/dealer channel) | Restoring a stock 600cc sportbike to showroom condition or matching a single damaged panel |
| Aftermarket matched code | High, with slight risk of batch variation | Request a physical paint swatch or sample panel and compare it to your bike under natural daylight, not indoor lighting | 3-7 business days | Cosmetic repair on a daily-ridden bike where “very close” is good enough |
| Custom color-matched mix | Very high when scanned; variable when eye-matched | Send a physical part (mirror, tank cover) or have the shop scan it with a spectrophotometer, then approve a sprayed sample swatch | 1-2 weeks | Custom builds, discontinued colors, or heavily sun-faded panels that no code can reproduce |
| Unfinished / primed fairings | None until you paint it | Inspect tab alignment and mounting points on arrival, and confirm the primer is compatible with your chosen topcoat | 2-5 business days | Racers, track-day riders, or owners who want full control of the paint and perfect tab alignment |
Why Verification Comes First
Every row above has a check that should happen before money changes hands. A factory code is only as good as the code you give the seller, and a custom mix is only as good as the sample the shop was handed. Aftermarket matched paint can shift from one production run to the next. Asking for a swatch, a scan, or a daylight comparison turns a guess into a decision. Apply the same standard to tab alignment: a flawless color match on a panel that will not bolt up is still a return.
Tab Alignment and Mounting Point Checks
Tab alignment is the other half of the order, and it is easy to check before you buy. Aftermarket panels rarely fit straight out of the box unless their mounting points copy the original geometry. Tabs, grommets, bolts, and clips all have to meet the subframe, radiator shroud, and side panels within a narrow tolerance. A few millimeters of drift at one point can pull the whole kit out of shape once everything is tightened down.
How Mounting Points Must Line Up
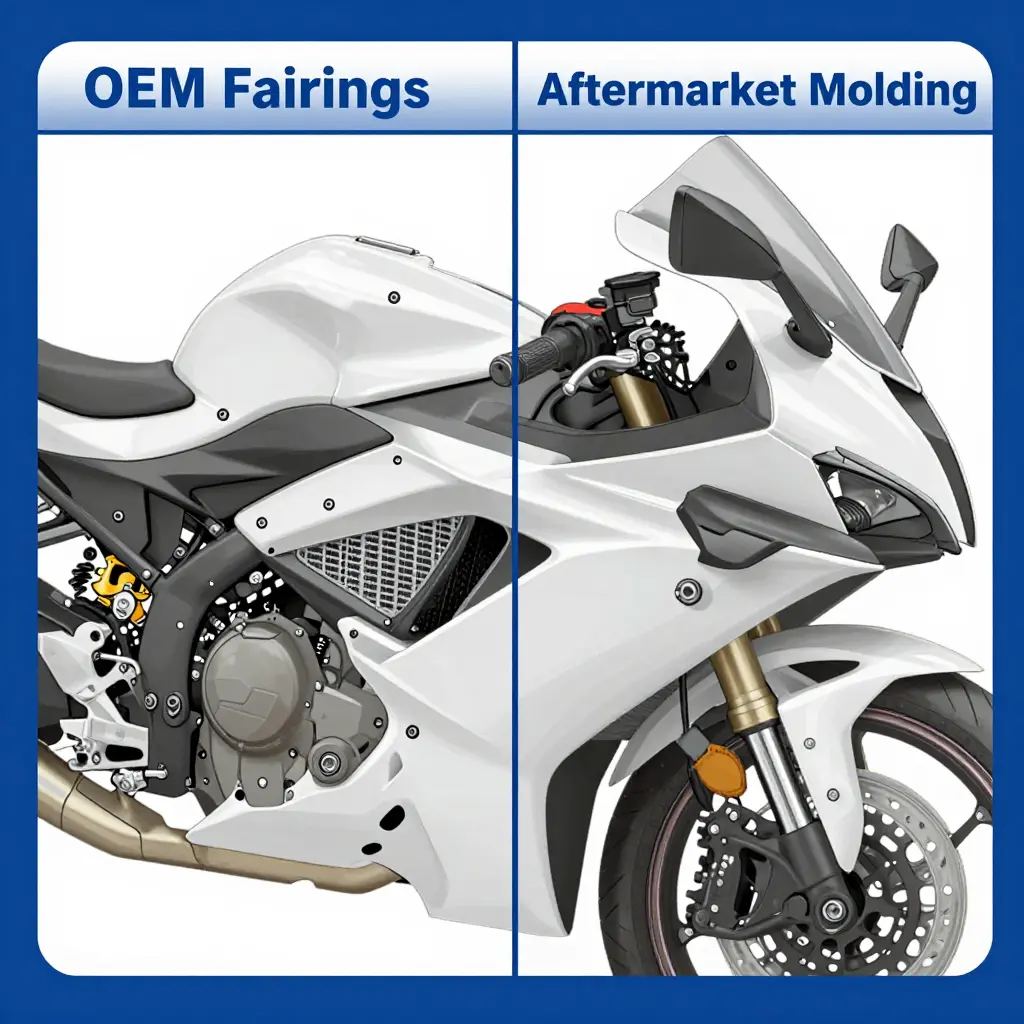
Mounting tabs are the main anchors. They stick out from the inner face of each panel and slot into the subframe or an intermediate bracket. On OEM fairings the tabs sit at consistent angles and depths because they come from factory tooling. Aftermarket molds can stretch or shrink, so a tab that should sit flush may stand proud and force the panel against the frame.
Grommets and clips handle the softer joints. Rubber grommets soak up vibration and allow a little movement; clips hold trim edges and inner liners. Drill a grommet hole slightly off-center and the bolt binds, which twists the panel. The radiator shroud is the fussiest of these because it bridges the side panel and the cooling duct, so a misaligned clip there loads both parts at once.
Signs of Misalignment
Misalignment usually shows up before the bike ever leaves the garage.
| Sign | What It Indicates |
|---|---|
| Uneven panel gaps | Molds are offset from OEM tab positions |
| Stress cracks near tabs | Forced fit concentrating load at one point |
| Excess vibration | Grommets or clips not seating correctly |
| Hard-to-close fasteners | Bolt holes drilled out of line |
Comparing OEM Tab Positions Against Aftermarket Molds
The most reliable check is to compare the new mold against the original. Lay both panels face down and measure the tab locations with a straight edge, or test-fit the new panel on the original bracket points before any paint work. If the tabs do not line up, no amount of careful tightening will settle the kit.
That is why the check belongs before the order, not after. Confirming tab alignment, grommet spacing, and clip geometry keeps you out of returns and repainting, and it protects the subframe from stress it was not designed to carry. Measure first, order second.
Tab Alignment Points at a Glance
It helps to know exactly where the mounting points sit. The diagram below maps the bodywork of a typical 600cc sportbike and marks each tab and bolt so you can check your replacement panels against the frame, radiator shroud, and tail subframe.
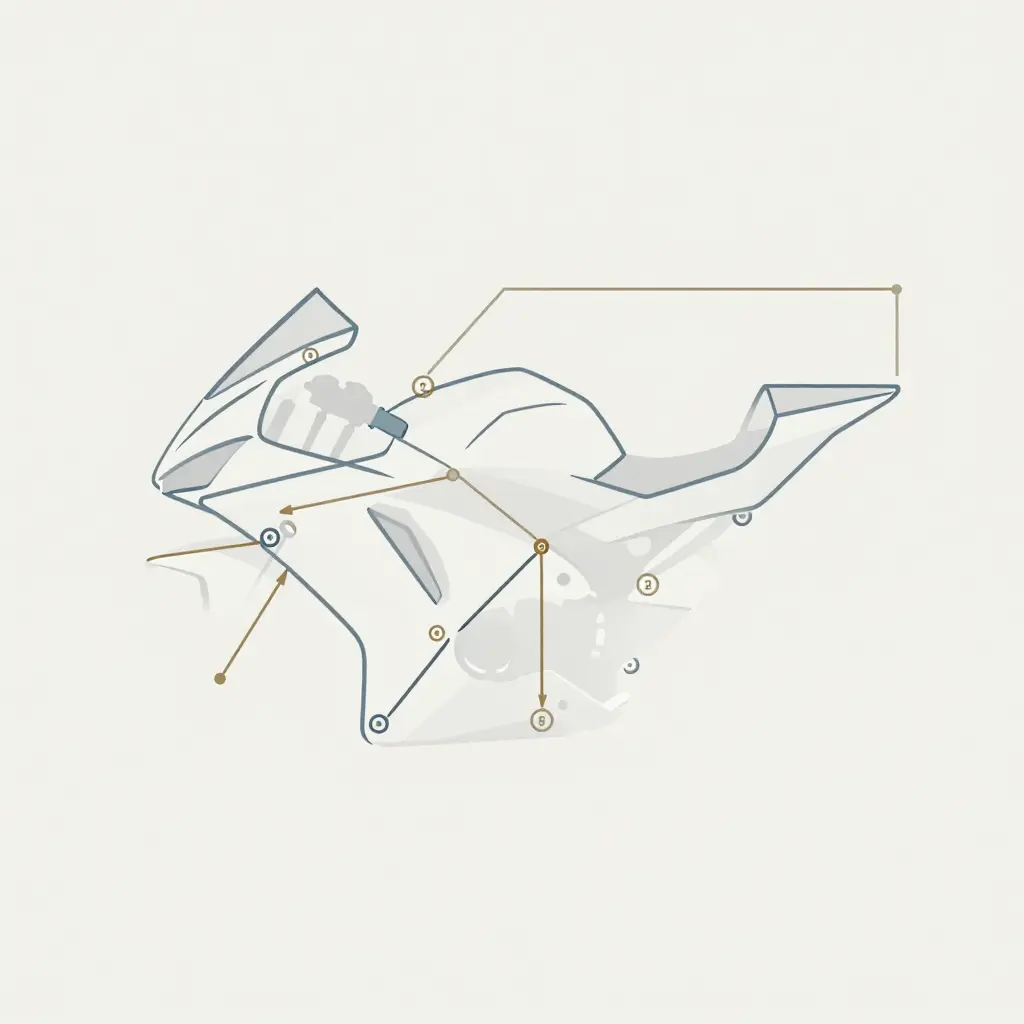
Use each numbered marker as a checkpoint during a dry fit. Sight from the tab to its mating surface and check that the gap is even on both sides. If a panel pulls or sits proud at one point, the tabs are the usual cause, not the paint. Checking here first saves you a return after the kit is painted.
Measuring and Verifying Tab Positions Before Ordering
Color match gets the attention, but it is only half the job. A perfectly matched set of 600cc fairings still has to bolt on, and that comes down to tab alignment. Before you order, measure how the new panels will actually attach.
Start With Reference Points on the Subframe
The subframe and stay brackets are the fixed landmarks everything else has to meet. Measure from a known point, such as the center of the steering head or a solid frame bolt, to each mounting tab, and write the numbers down. When the new panels arrive, measure the same distances and you will spot a mismatch before you start forcing anything.
Compare Bolt Hole Spacing
Bolt holes do not lie. With calipers or a steel rule, measure center-to-center between the mounting holes on the OEM panels you are replacing. Ask the retailer for the same measurement on their set, or read the fitment diagram they publish. A few millimeters of drift means elongated holes, oversized bolts, or a panel that never sits flush.
Check Tab Thickness and Angle
A tab that is too thick will not slide into its slot; one set at the wrong angle will not reach the bracket. Check the angle of each tab against the panel and note the material thickness. Thin, brittle tabs crack under vibration, and oversized ones load the subframe.
Review the Retailer’s Fitment Data
Good sellers publish fitment charts by year, model, and generation. Read them closely. Plenty of “universal” sets are marketed as fitting several years when the mounting points actually changed in the middle of that range.
Why This Protects Your Wallet
Sorting out tab alignment up front means less drilling, shimming, and modifying. It also keeps you out of the return-and-restock cycle, which on a big bodywork kit is slow and expensive.
Two Checks, One Decision
Color and fit are a pair. A great match on a panel that will not mount is useless, and a perfect fit in the wrong shade is no better. Check both and you place one order instead of three.
Why 600cc Owners Swap Out Their OEM Fairings
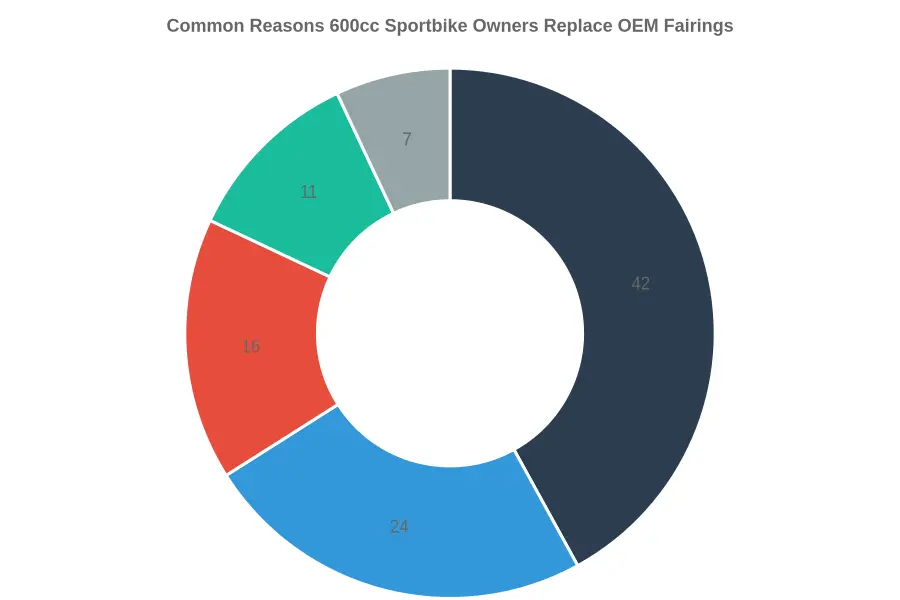
The reasons riders replace stock fairings matter to buyers and retailers alike, because they drive demand. The doughnut chart below breaks down the most common motivations.
| Reason | Share |
|---|---|
| Crash Damage | 42% |
| Cosmetic Upgrade | 24% |
| Crack Repair Cost Avoidance | 16% |
| Track Use | 11% |
| Color Change | 7% |
Reading the Numbers
Crash damage dominates at 42 percent, which tracks with bikes that see hard riding and the occasional low-side. Cosmetic upgrades come next at 24 percent, from riders after a sharper or more personal look. Crack repair cost avoidance sits at 16 percent, the point where a fresh set beats shop labor on patched plastics. Track use accounts for 11 percent, since track bikes often run cheap, easily swapped bodywork. Color change rounds it out at 7 percent. For a retailer, that split is a stocking decision: how much OEM-match versus aftermarket to carry.
Frequently Asked Questions About Replacing OEM Fairings
How do I confirm the exact color match for my specific 600cc model?
Pull the factory paint code off the bike. It is usually on a sticker under the seat, inside the tail, or on the frame near the VIN. Give that code, plus your exact model and production year, to the seller so they can pick or mix the right shade. The same “red” or “blue” can shift between model years, so never rely on a photo alone.
Do aftermarket fairings use OEM tab positions?
The good ones do. Reputable sets are molded from factory tooling or 3D-scanned originals, so their 600cc fairings reuse the OEM tab positions. Budget kits can drift a few millimeters, so ask the vendor whether the molds are OEM-spec. Good tab alignment is the best single predictor of a clean, rattle-free install.
How can I check tab alignment without the bike present?
Ask for close-up photos of the mounting tabs next to a ruler, or a short video of the panels test-fitted to a bare frame. You can also request the tab measurements and compare them against your own OEM fairings with a caliper. Catching a misaligned kit this way saves you the shipping.
Are the pre-drilled holes guaranteed to align with OEM bolts?
On quality kits, yes. The pre-drilled holes are positioned to match stock bolt locations, so the original fasteners drop in. Cheap sets sometimes ship with pilot holes that need light filing, so check the return policy before ordering 600cc fairings. A hole that is off by more than a millimeter or two is a red flag.
How do I verify fitment across different model years?
Fitment can change inside a single generation, so match the fairing kit to your exact model year, not just the model name. Cross-reference the part numbers and ask whether the OEM fairings carried over unchanged that year. If you are unsure, send the vendor your VIN, because it ties directly to the correct trim and color.
What if the color match or tab alignment is slightly off when my kit arrives?
Keep the packaging and photograph the mismatch right away. Most sellers honor claims only before the panels are installed. A small color variance can often be handled with touch-up paint, and minor tab issues may respond to gentle heat. A vendor with a clear exchange policy protects you either way.
Conclusion
Two checks matter more than any spec sheet when you order replacement bodywork: color match and tab alignment. Getting them right is the difference between a clean, factory-looking rebuild and a pile of almost-fit panels.
Color match keeps the new panels blending with the rest of the bike. A slight shade difference shows up in sunlight, and repainting to fix it costs money you did not plan on. Confirm the paint code and the supplier’s finish quality before you commit.
Tab alignment decides whether the panels mount at all. A 600 has a tight set of mounting points. If the tabs sit even a few millimeters off, you are drilling, filing, or living with a rattle at speed. Verified tabs mean the parts bolt on the way they should.
Together they keep buyers away from poor fitment, mismatched finish, and costly returns. A supplier with broad model coverage and fair pricing makes the rest of it simpler.
Do the checks, and replacing damaged bodywork turns into one more step toward getting the bike back on the road.